How to Build an Outdoor Kitchen with Cinder Blocks | A few Simple Steps

Are you going to change your kitchen? Or want to replace your kitchen from indoor to outdoor? If you think about making a new small and customized kitchen interior, the best solution is to make your outdoor kitchen with cinder blocks. Read on how to build an outdoor kitchen with cinder blocks built one for you.

Nowadays, cinder blocks are using as a crucial component of a construction project. You know, people use it instead of bricks. Because of its reasonable cost, many deluxe couples and companies prefer to use it in their construction. However, in case you intend to renew your kitchen and move to an outdoor area.

That’s why keep reading the whole article to know the pros and cons of using cinder blocks in your building constructions.

How to Build an Outdoor Kitchen with Cinder Blocks | a few simple steps:

Build an Outdoor Kitchen with Cinder Blocks

I experienced different homemakers and constructors individually. I have learned about the whole process. Now I’m going to share with you. First of all, what I witnessed is the primary process is not much tricky; instead, planning is a crucial part. So I will describe every single portion of planning in detail to decorate the kitchen perfectly.

To execute the project of making your kitchen, you have to follow the steps.

Step-1: Measure Your Allotted Area

Measure your allotted area precisely. So, think of a dimension of all the kitchen stuff’s location as per those square feet area. Calculate the estimated size of plumbing rough-in to get a proper measurement. Correct measurement is the most crucial part of the whole project. Because if you do not measure something correctly, perhaps the plan will not run out in the long run. 

Step-2: Draw a Rough Sketch

Before starting your kitchen project:

  1. Make an illustration of your plan.
  2. Measure the place and draw a rough sketch.
  3. Use graph paper and imagine the square grids as feet.

As a result, you can quickly put your plan in the sketch. And then, calculate your kitchen’s proper location. After making the drawing, consult about this with your contractor. It will be helpful for you; they can add something or erase it. Think about the piping lines and drains, where they should go. Not only that, but also make an image on your mind where your stove outlets, refrigerator, dishwasher, and sink plumbing should place. Start to positioning them in your drawing according to your imagination.

Step-3: Utilizing the Cinder Block’s Dimension

Most of the traditional cinder block’s length is almost 16 inches, wide is nearly 8 inches, and 8 inches tall. You can find them as rectangular sizes and square sizes too. The square size’s cinder block is roughly 8-by-8-by-8. 

Since these are the standard sizes, so

  • It will be the best plan if you make a plan considering the sizes.
  • Design your project as per the thorough use of the blocks.
  • There will be a little difference from block to block, making a straightforward design calculating all the aspects.
  • As a result, you will not have to break any blocks and cut them to match your dimensions. 

Step-4: Think about the walls.

Since you are drawing your project till now, think about a more substantial wall. Run your plan as you can make a wall that does not hamper the estimated leading dimension. Think about the thickness of walls so that it becomes heavy walls. 

Step-5: Estimate the Need for Cinder Blocks

When you can calculate the block’s dimension with your kitchen floor, you can quickly know how many cinder blocks are needed. So, write down a note calculating the dimensions and find out how many blocks will need. Place an order as per your calculation. Try to order a bit more number cinder blocks. 

Outdoor Kitchen with Cinder Blocks

Step-6: Make a List of the Needs

After counting the blocks, you need to measure other associating things. Make a rough list of them, whatever you need. You know very well about your needs. So, write them down too. 

Step-7: Estimate a Rough Expenses amount

When you know what you need to buy or order, you have to make an estimated amount of your expenses.

Step-8: Plan for Electrical Stuff and Plumbing

At this point, you need to consider electrical stuff and plumbing. You may not need to start wiring or plumbing by yourself. That will make the contract plan for where you should place it. Because if you install them in the wrong place, you will have to break the whole wall or plumbing. So it won’t be pleasant.

Step-9: Start the Main Project of Building

Start the Main Project of Building

After all the measurements and decoration planning, you have to put your mind to make it works. Call a contractor and let him start his work. Show him the ordered cinder blocks and other associates to confirm, it is okay or not. Ask him if you need anything else or not to clarify.

Have an idea about Adhesive Dry Time: To start the project, you need another idea to know how much time will take for the adhesive to dry. Consequently, you will be relaxed and confident to check the wall or floor to make sure is it dry or not.

  • Start Building

Now start to build step by step. 

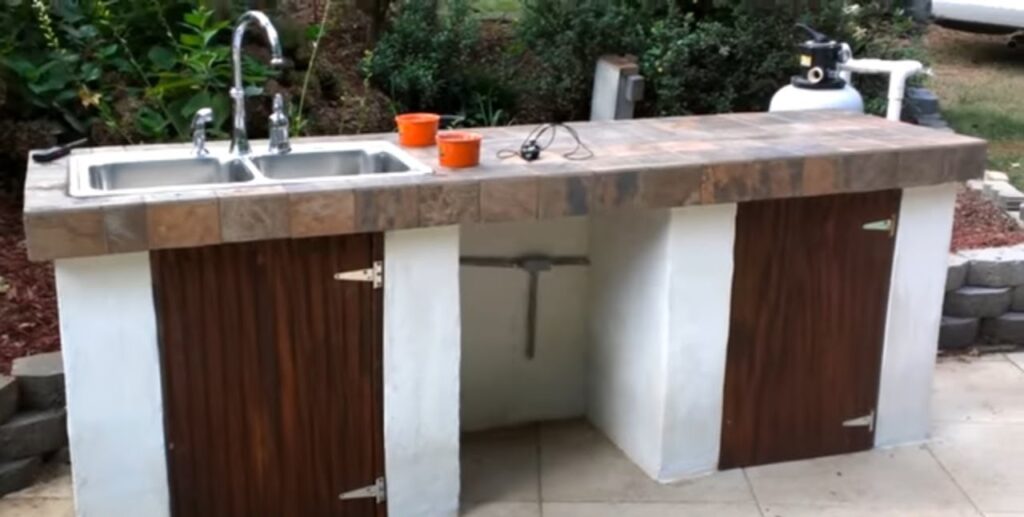
  • Install the Sink and Drag the Drains

It will be easy if you install first the kitchen sink and drag the drain lines. Some of you may think, will it be easy; before making walls or bases. I want to say, no problem. As it is an outdoor kitchen, so it won’t bother you seriously. 

  • Do Clean the Floor

After doing plumbing work or dragging the drain, the floor must be messy. Clean the floor thoroughly so that the cinder blocks are placed smoothly on the tiles of the floor. As you know, during the dry adhesive time, try to clean before drying. Then it will be fruitful. 

  • Use a Chalk to Outline Your Kitchen Floor

After cleaning the floor, use a white marker to outline your kitchen. Through chalk lines, you or your contractor will be able to place the cinder block straightly. Or else, the baseline will zigzag. That won’t be nice.  

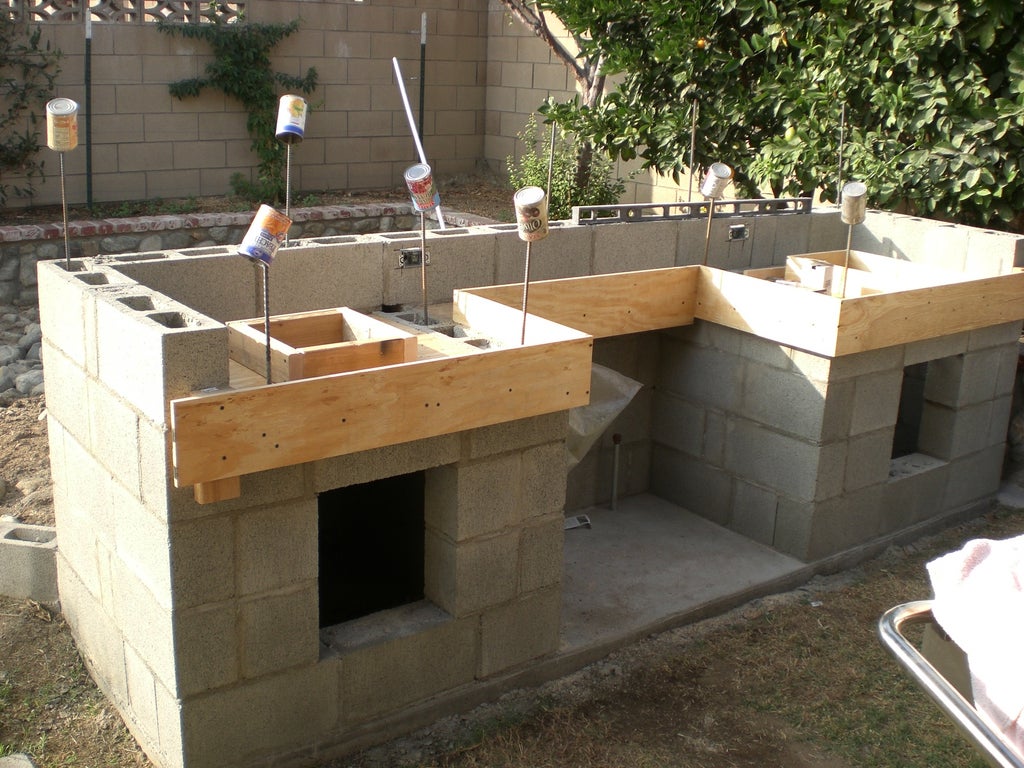
  • Now Lay Your Cinder Blocks

Through the lines, now place the cinder blocks gently. Use a proper texture cement to lay the blocks. Do not cross the white chalk’s line. Make sure you start a horizontal row to place your cinder blocks from a corner. A forward-facing wall is a perfect place to start from. 

Start to lay the first block, then place the 2nd one along the wall, and another one is along the back of the block. Continue it on every side of the floor, except the forward-facing one. Space a quarter inch at the seams’ front will be sufficient for avoiding any extra adhesive from pushing out into a visible area.

  • Make a Base Row 

As with placing the first cinder block, do the same process. Place the next blocks one by one. Make a strong row base nicely. However, use adhesive externally between the seams of two blocks and floor. Line up the blocks evenly with a delicate hand to create a nice and clean look. 

That is how you should continue all the walls building. Make sure to wiring the electricity connections. 

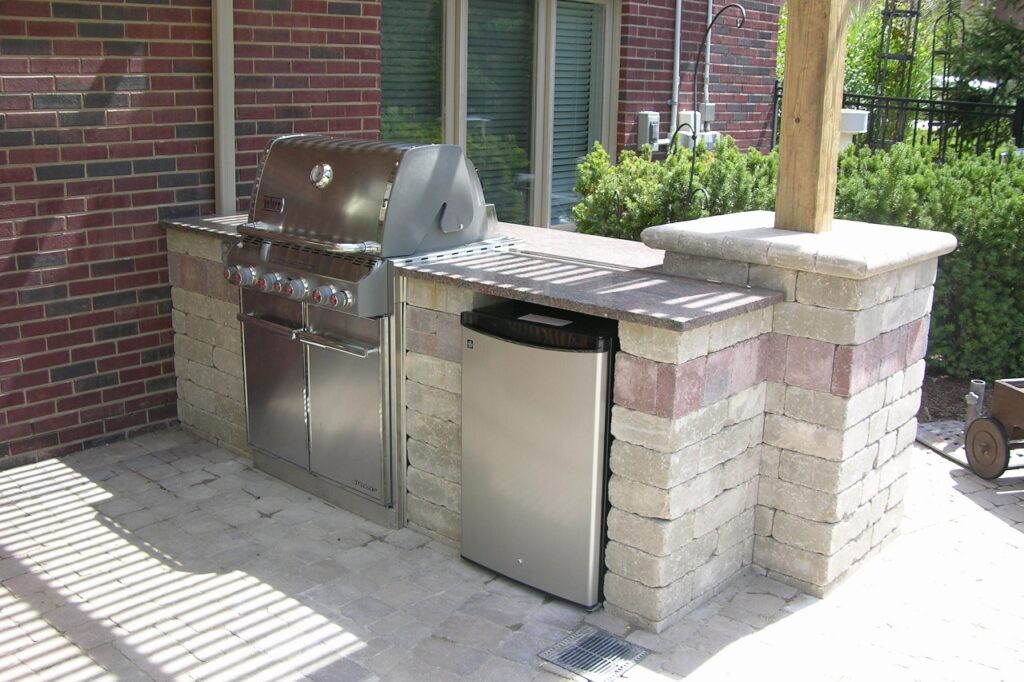
After completing the interior decoration as per your plans, you can make an outdoor seat in front of your kitchen using cinder blocks. Except those, you can add something or develop your ideas with your contractor or engineer’s help. 

Conclusion: 

How to build an outdoor kitchen with cinder blocks | a few simple steps taught us effective ways. Before starting the primary process, consult with an engineer to avoid going in vain. Then, make an excellent idea to make your dream come true to relocate your kitchen. 

I firmly believe that if you follow the steps and tricks to build something with cinder blocks, you will have a fantastic outcome. Indeed, you won’t regret your expenses; literally, you will save an ample amount of your money by using cinder blocks instead of bricks. Have a BBQ party every evening with your new outdoor kitchen and enjoy your life. Enjoy your cooking.

Share:

Comments(0)

Write a comment