How To Replace Cartridge In Price Pfister 2 Handle Kitchen Faucet
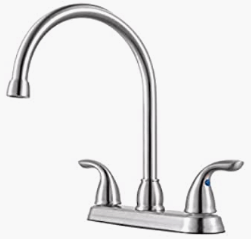
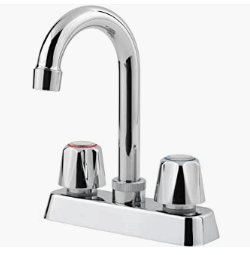
Pfister kitchen faucets come with single or two handles. A two-handle Pfister faucet provides cool and warm water side by side. Most people like to have a two-handle price Pfister faucet in their kitchens. Unfortunately, the cartridge of your Pfister may wear off due to corrosion. That’s when you may be eager to learn “how to replace cartridge in Price Pfister 2 handle kitchen faucet.”
You have to replace the cartridge to make the Pfister faucet rerun. Read this step-by-step instruction to learn to replace the cartridge by yourself. And then, you will get instructions on installing a price Pfister faucet. The frequently asked questions will let you know some relevant important information. So, let’s jump into this article’s main parts for more details.
What is a Pfister faucet?
Pfister, previously known as Price Pfister until 2010, is a manufacturer of kitchen faucets and other plumbing fixtures. It produces shower systems, bathroom and lavatory faucets, showerheads, and accessories. William Pfister and Emil Price formed the company in 1910.
Although some Pfister kitchen faucets are made of stainless steel, the majority of the Pfister collection is made of high-quality lead-free brass. The conventional faucet material is brass. It’s tough enough to withstand the flow of water, yet it’s also simple to shape and mold. It’s also sanitary.
A step-by-step guide to replacing cartridge in price Pfister 2 handle kitchen faucet:
Assuming you have a Price Pfister 2-handle kitchen faucet, the process to replace the cartridge is as follows: First, shut off the water at the shut-off valves under the sink. Place a towel over the drain hole to catch any drips, and unscrew the decorative cap from the top of each handle.
A hex wrench will aid you in removing each handle’s set screw and pulling off the handles.
- Shut off the valves under the sink to turn off the water supply to your faucet.
- Unscrew the handle of your faucet to remove it and expose the cartridge
- Use a pair of pliers to remove the old cartridge from your faucet
- Insert the new cartridge into your faucet and screw on the handle
- Turn on the water valves under your sink and test your new cartridge!
Price Pfister Kitchen Faucet Repair Manual
If you need to repair your Price Pfister kitchen faucet, you can find the Price Pfister Kitchen Faucet Repair Manual online. This manual, with detailed instructions, helps troubleshoot and repair your kitchen faucet. The first thing you should do is check the water supply lines if your kitchen faucet is not working correctly.
Ensure that the water supply lines are connected to the shut-off valves and that there are no leaks. Turn off the water supply to check for leaks, and call a plumber if you find any leaks. Furthermore, if your water supply lines are okay, check the kitchen faucet’s aerator.
The aerator can get clogged with mineral deposits or other debris. Clean the aerator with a vinegar or commercial cleaning solution designed to remove mineral deposits. If your kitchen faucet still does not work properly after checking the water supply lines and cleaning the aerator, it is time to replace some parts.
The following parts that may need to be replaced are washers, o-rings, and cartridges. You can find these replacement parts at most hardware stores or online retailers that sell plumbing supplies.
Price Pfister Kitchen Faucet Cartridge Removal Tool
If your Price Pfister kitchen faucet is troubling you, it may be time to replace the cartridge. It is a relatively easy repair that anyone can do, and all you need is a special tool to remove the old cartridge and install the new one.
Step-1: Turn off your kitchen sink’s water supply.
Step-2: Use a hex wrench to remove the screws that secure the handle to the faucet body. You will see the cartridge inside after removing the handle. You’ll need a special “cartridge removal tool to remove the old cartridge.”
You can buy this tool at most hardware stores or online. Once you have this tool, simply insert it into the top of the old cartridge and twist it until it pops out. With the old cartridge removed, clean any debris inside the housing with a rag or paper towel.
Then, take your new cartridge and insert it into place. Make sure it’s seated properly, then use your hex wrench to screw on the handle tight. Once everything is tightened up, turn on and check the new faucet water supply.
If all goes well, you should have a fully functioning kitchen faucet again.
How to Replace Pfister Kitchen Faucet Cartridge
If your Pfister kitchen faucet is leaking or not performing as it should, it may be time to replace the cartridge. It is an easy repairing process that anyone can do with basic do-it-yourself skills. Here’s how:
Step-1: Turn off your faucet’s water supply by shutting off the valves under the sink. Place a towel over the sink to catch any drips, and remove any dishes or other items from around the sink.
Step-2: Use a hex wrench to remove the handle of the faucet.
Note:
If you don’t have a hex wrench, you can use a regular screwdriver, but be careful not to damage the finish of the handle.
Step-3: Once the handle is removed, you’ll see a retaining nut holding the cartridge. Use an adjustable wrench to loosen and remove this nut (lefty loosey, righty tighty).
Step-4: Pull out the old cartridge and take it with you to your local hardware store so you can find an exact replacement. Be sure to get one that has “Pfister” stamped on it – there are many different brands and styles of cartridges, and they are not all compatible with each other!
Step-5: Insert the new cartridge into place and hand-tighten the retaining nut until it’s snug against the cartridge body (again, lefty loosey, righty tighty).
Don’t over-tighten – just make sure it’s snuggled up well and won’t come loose when you turn on the water pressure again later!
Step-6: Reattach The faucet handle(s), turn on the water supply at shut-off valves under the sink, and check for leaks around the base of the handle(s) AND at the base of the spout itself. If no leaks are present, open the cold side valve first, then open the hot side valve slowly until the full water pressure is restored through the system.
Start using your “new” kitchen faucet!
How to Remove Price Pfister Kitchen Faucet Handle
If your Price Pfister kitchen faucet is leaking or needs to be replaced, you’ll need to remove the handle. You can do it by following these simple steps:
1. Shut off the water supply to your faucet to start the kitchen faucet handle removal task.
You’ll find the shut-off valves under your sink.
2. Next, use a screwdriver to remove the set screw that holds the handle in place. The set screw is usually located on the underside of the handle.
3. Now, pull the handle off of the faucet stem.
4. If there’s a decorative cap over the top of the faucet stem, you’ll need to remove this before proceeding further. Use a flathead screwdriver to pry it off.
How to Replace Pfister Cartridge 974-074
If your Pfister faucet is leaking or the water flow is weak, it may be time to replace the cartridge. The Pfister 974-074 cartridge is a replacement for many older Pfister models and some of the newer ones. Replacing the cartridge is a relatively easy task that most homeowners can do, and it only takes a few minutes.
Here’s how:
1. Shut off the water supply to your faucet to begin the task. You’ll find the shut-off valves under your sink.
2. Use a Phillips head screwdriver to remove the cap from the handle of your faucet. Behind the cap, you’ll see a small set screws. Use an Allen wrench to loosen and remove this set screw.
3. With the set screw removed, you should now be able to pull off the handle of your faucet. Set it aside, being careful not to lose small parts like washers or o-rings that may have come loose with it.
4. Look at the stem of your faucet where the handle was attached; you should see a metal sleeve over a plastic sleeve (this is what holds the cartridges in place).
Use an adjustable wrench or pliers to unscrew and remove this metal sleeve. And be careful not to damage either sleeve as you do so!
5a). If you have an older model Pfister faucet (pre-2003), simply pull out both cartridges at this point and discard them – they cannot be rebuilt or reused in any way.
If you have a newer model Pfister faucet (post-2003), carefully remove just the outer plastic sleeve at this point, and be careful not to damage it, you will reuse this later on.
5b). Now take your new 974-074 cartridge and lubricate its seals with some plumber’s grease – this will help it seat when you install it.
6). Carefully insert the new cartridge into place (matching up the splines on the side), ensuring it seats in.
7). If You Removed just the outer plastic sleeve earlier, go ahead and reinstall it now, being careful not to either damage or over-tighten it.
How to Replace Pfister Bathroom Faucet Cartridge
If your Pfister bathroom faucet is leaking or not functioning correctly, it may be time to replace the cartridge. A broken or worn-out cartridge can cause many problems, so it’s best to nip the issue in the bud as soon as possible. Luckily, replacing a Pfister bathroom faucet cartridge is a relatively easy task that anyone can do with patience and some essential tools.
To begin, shut off the water supply to your bathroom sink. This will prevent any accidents while you’re working on the faucet. Next, use a pair of pliers to remove the handle from the faucet.
You may need to use a screwdriver to remove a set screw that holds the handle in place; if so, be careful not to strip the head of the set screw. With the handle removed, you should be able to see the cartridge inside the housing. Use a wrench or pliers to remove the retaining nut that holds the cartridge in place, then pull out the old cartridge and discard it.
Take a close look at how everything was positioned before removing anything. It will help you to reinstall them back together correctly. Inserting The new cartridge is simply a matter of reversing these steps; first, thread on the retaining nut by hand until it’s finger-tight, then use your wrench or pliers to give it another quarter turn or so for good measure.
Finally, reattach the handle, turn on your water supply, leave both handles open, and check for leaks around both handles and under the sink itself before calling it quits for good!
Price Pfister Bathroom Faucet Repair Manual
If you’re like most people, your bathroom is one of the most used rooms in your home. And that means that your bathroom fixtures see a lot of wear and tear. Over time, even the best-made fixtures can start to show their age.
That’s why it’s essential to know how to repair them when they break down. Price Pfister is one of the leading manufacturers of bathroom fixtures, and its products are known for their durability and quality. But even Price Pfister products can eventually need repairs.
Fortunately, the company offers a detailed repair manual to help you fix the most common problems with their products. The Price Pfister Bathroom Faucet Repair Manual covers the most common issues you may encounter with your Price Pfister bathroom faucet. It includes step-by-step instructions on troubleshooting and fixing problems, as well as detailed illustrations and photos.
This manual is essential for anyone who owns a Price Pfister bathroom faucet. With its help, you can keep your fixture looking and working like new for many years.
How Do You Replace a Price Pfister Kitchen Faucet Cartridge?
When it comes to replacing a Price Pfister kitchen faucet cartridge, follow the below stated steps. First, arrange the necessary tools for the job. You’ll need an adjustable wrench and a Phillips head screwdriver.
Next, study the instructions manual that comes with your replacement cartridge. This will give you a good idea of what needs to be done. Once you have all of the necessary tools, it’s time to get started.
Shut off your kitchen sink’s water supply to start the process. Next, use the Phillips head screwdriver to loosen and remove the screws that hold the handle in place. After removing the handle, you see the cartridge itself.
Use an adjustable wrench to loosen and remove the old cartridge from its housing. Now install the new cartridge to your Pfister kitchen faucet. Start by applying some plumber’s grease or Vaseline to its O-rings.
This will help ensure a tight seal during reinstall. Once that’s done, simply insert it into its housing and tighten it down with your adjustable wrench until snug. Finally, reattach your handle and turn on the water supply again before testing out your newly replaced Price Pfister kitchen faucet cartridge!
How Do You Change the Cartridge on a Double Handle Faucet?
If your faucet is leaking, it’s time to change the cartridge. This process is different for every type of faucet, but luckily, it’s easy to figure out. Here’s a step-by-step guide on how to change the cartridge on a double-handle faucet.
Step-1: Start by shutting off the water supply to your faucet. You’ll usually find the shut-off valves under the sink.
Step-2: Use a Phillips head screwdriver to remove the screws that hold the handles in place.
Be careful not to strip the screws – if they’re stuck, try using some WD-40 or another lubricant.
Step-3: Once the handles are off, you can locate the cartridge inside. It will be attached with either a nut or a clip (depending on your faucet model).
Step-4: Use an adjustable wrench or pliers to loosen and remove the old cartridge from its housing. If it’s stuck, you may need to use a hammer lightly tap around it until it comes loose.
Step-5: Inspect the o-rings and seats for wear and replace them if necessary before installing the new cartridge.
Step-6: Insert The new cartridge into its housing and tighten with an adjustable wrench or pliers until snug – don’t over-tighten!
Step-7: Replace and tighten down the handles using your Phillips head screwdriver.
Step-8: Turn on the water supply at the shut-off valves and test your faucet.
That’s all there is to it! Changing a cartridge should only take about 15 minutes – half an hour tops – so there’s no need to call in a professional (unless you’re having difficulty with any of these steps).
How Do You Fix a Dripping Kitchen Faucet With Two Handles?
If your kitchen faucet is dripping from the spout, you should first check the O-rings. These are usually located under the handles. They will need to be replaced if worn out or damaged.
You can do this by unscrewing the handle and removing the O-ring. Once you have done this, simply replace it with a new one and screw the handle back on. If your kitchen faucet is dripping from one of the handles, it is likely that there is an issue with the packing nut.
The packing nut is located under the handle and holds everything in place. Turn it clockwise until it is snug against the stem of the faucet.
If neither of these solutions works, it is time to replace some parts inside your faucet. That includes things like washers, seats, and springs. To do this, following the manufacturer’s instructions, you must shut off water to your entire home (or at least to your kitchen) and disassemble your faucet.
Once you have all of the pieces removed, take them to your local hardware store so that they can help you find replacements that fit properly.
How Do You Fix a Dripping Kitchen Faucet Pfister Cartridge?
A dripping kitchen faucet is a common problem that many homeowners face. You will find different ways to fix this problem, but the most common and effective way is to replace the Pfister cartridge. This is a relatively simple process that anyone can do with basic plumbing knowledge and a few tools.
Turn off the water supply of your kitchen sink to start the replacement. This can be done by shutting off the valves under your sink or at your main water shut-off valve. Open up your faucet after turning off the water supply to relieve any pressure in the lines, and then use a wrench to remove the handle.
Next, use a utility knife or sharp object to remove the old Pfister cartridge from its housing. Be careful, and don’t damage the surrounding area as you do this. Once the old cartridge is removed, take it to your local hardware store to find an exact replacement.
If they don’t have an exact match, get close to one and make sure it has the same number of splines on its shaft. Reverse the procedure to install the new cartridge.
Conclusion
If your Pfister faucet leaks, you may need to replace the cartridges. So, “how to replace cartridge in price Pfister 2 handle kitchen faucet?” Replacing the cartridge in your Pfister kitchen faucet is relatively easy. Anyone can perform this task with the help of a few tools. First, shut off the water supply to the faucet and remove the handle screws.
Next, use a hex wrench to remove the retaining nut and pull out the old cartridge. Be sure to note which way the old cartridge was facing so you can install the new one in the same orientation. Once the new cartridge is in place, reassemble everything and turn on the water supply.
Test your faucet to make sure there are no more leaks.
You may like to read:

Comments(0)